My darling husband is not a picky man. He will cheerfully eat just about everything I put in front of him with nary a complaint. There is, however, one thing that he insists on: pumpkin pie at Thanksgiving.
In the early years of our marriage, I struggled with this. I made pumpkin chocolate tarts and pumpkin bread puddings, pumpkin panna cotta and pumpkin cheesecakes. He always took a polite bite and reached for the plain pumpkin pie (that someone wiser than me always provided).
Now I’ve wised up and have come to realize that he was right all along — there’s something really marvelous about a perfect piece of pumpkin pie — the smooth pie filling with its faint vegetal flavor warmed by spices, the crunch and plainness of the crust contrasting with the creamy flavorful filling. Now, even though I sometimes ALSO make pecan pie or spiced buttermilk pie or even cranberry pie, I can’t imagine a Thanksgiving table without plain old pumpkin pie.
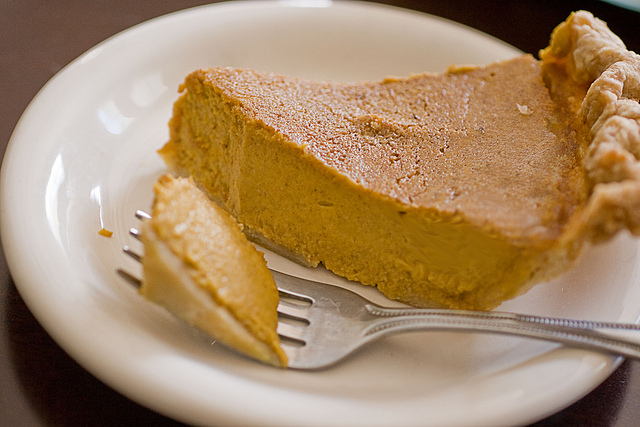
But since I’m me, I wasn’t satisfied with plain old pumpkin pie. It had to be perfect plain pumpkin pie. The best pumpkin pie you’ve ever tasted. And when I tasted my aunt Sally’s creamy pumpkin pie with its perfect balance of spices last Thanksgiving, I knew this was it. And I begged her for the recipe, so I could share it with you. (Together with step by step photos of pie crust making — read on!)
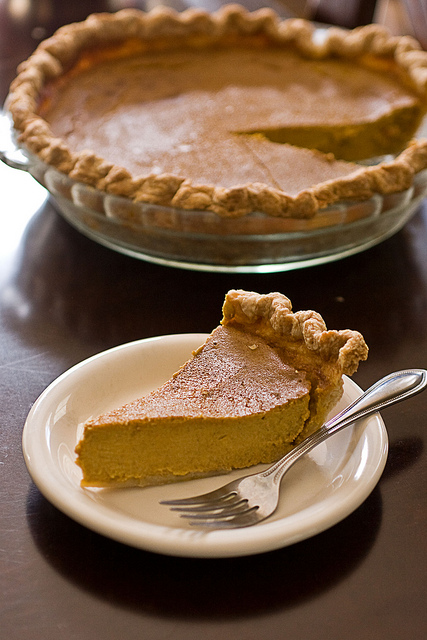
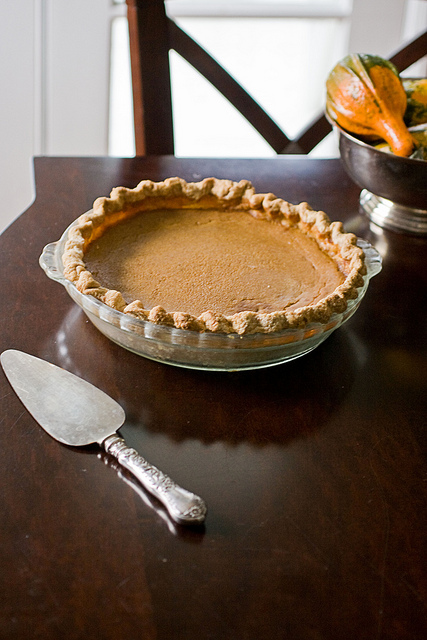
Of course, no great quest comes without its trials. I made the pie last weekend — the crust got too dark. Armed with a pie shield and shortening the blind baking time, I baked another crust on Tuesday, and it shrunk and warped horribly. Thanks to some internet advice and more pie weights, I tried again Thursday night — nailed the crust, but the filling curdled and the top got too brown. Finally, on Saturday, I invested in an oven thermometer, lowered the heat significantly, moved the rack down in my oven (I think this was key), and managed the pie you see above.
It really is perfect — dreamy creamy, it slips on the tongue like a French kiss. The spices add warmth and that “holiday” aroma without becoming bitter or overwelming, and the pumpkin flavor shines through. When it comes out of the oven, it has just a little jiggle to add to the excitement. Nobody could call this pumpkin pie plain.
Lets go back to the crust. I’m still using the Ruhlman ratio and the Child food processor technique, but I’ve refined it.
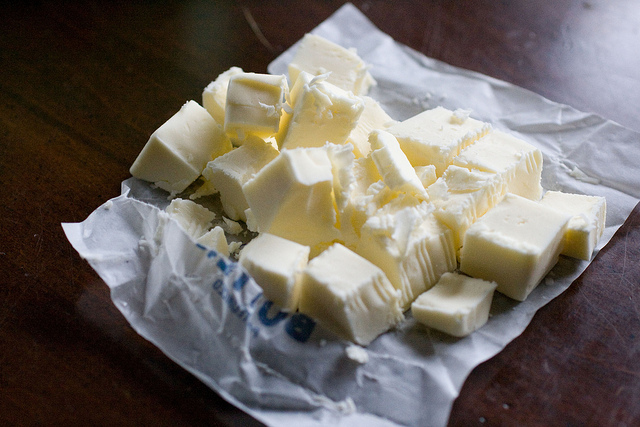
Butter is frozen, cut into cubes. Pulse it with the flour and salt in the food processor only about 5 or 6 times — there should still be chunks of butter.
Add your water all at once, and pulse only a couple of times to mix. In Los Angeles, my flour is often dry dry dry, and I often have to add a little more water.
The dough should look like pebbles, like this:
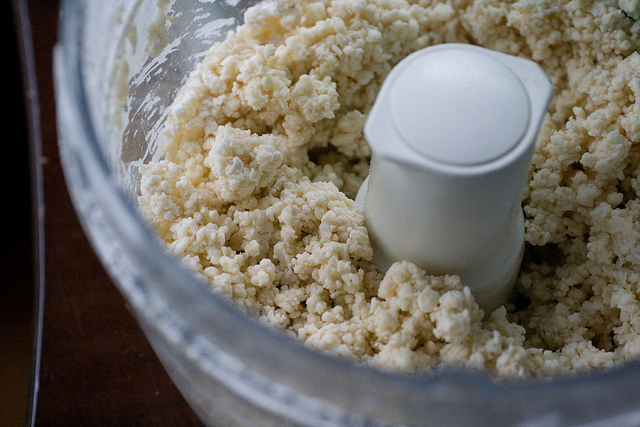
Form into a disc, and chill.
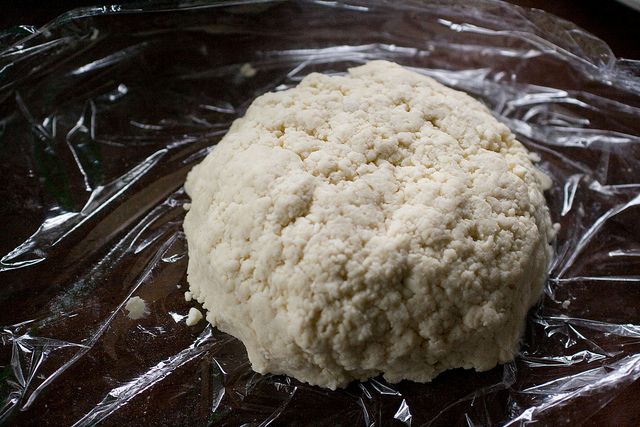 When your dough is chilled, lay a piece of parchment on the counter, sprinkle with flour, add the dough disc, then more flour, then the other piece of parchment. Roll the dough, starting from the center and rolling out in all directions. Make sure to peel it off the parchment and flip it over at least once, adding more flour. You want your dough to be flattened but not stretched.
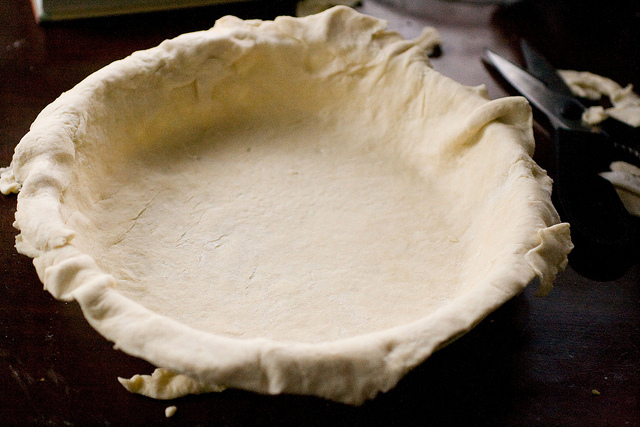
When it’s big enough, peel off the parchment and move it to your pie plate. Take some time to lift the edges of the dough and make sure that the inside corners of the pie plate are covered. Using scissors, trim the overhang of the dough to 1/2 inch. Use any scraps you have to fill in any holes in the edges, adding layers of dough. Then pinch it together so it stands up nicely, and put that pie crust back in the fridge for at least 15 minutes, while the gluten relaxes and the dough firms back up.
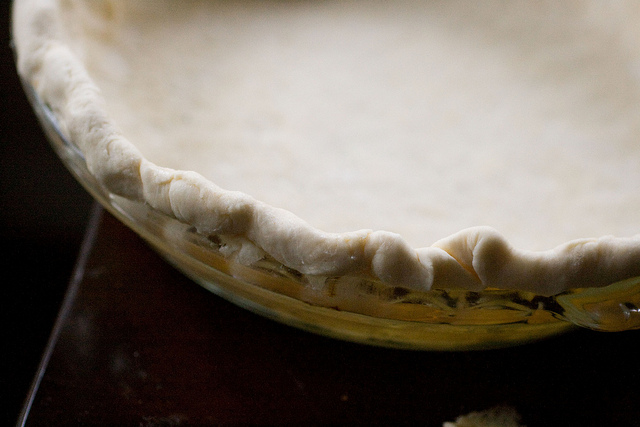
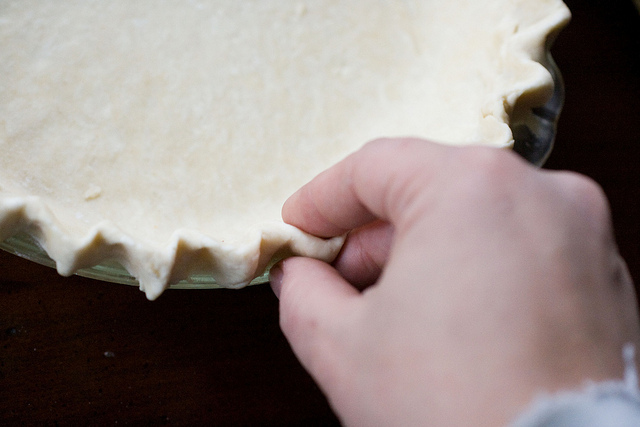
When it’s chilled, using two fingers and your thumb, crimp the dough into a fluted pattern.
Prick all over with a fork (sides too!) Line carefully with tin foil, and fill the tin foil with pie weights (e.g., pie weights, dried beans, uncooked rice, uncooked barley). Lay a shield atop the pie crust, or cover with tin foil. Then bake it, and let it cool before filling it.
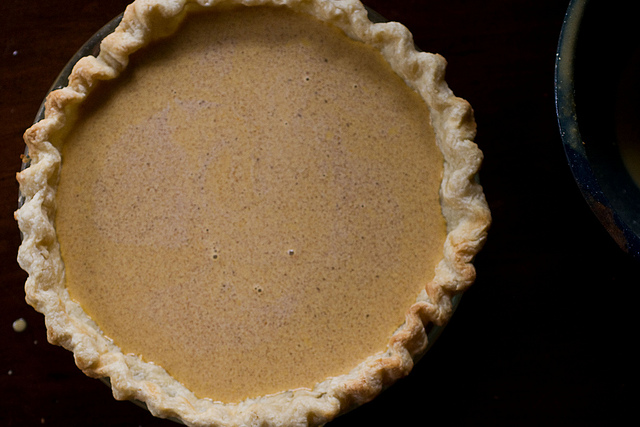
Mix your filling, and beat the crap out of it. Also, don’t substitute white sugar + molasses for brown sugar. Also, use good spices. Pour the filling into the cooled shell. Top it with the pie shield again, or protect the crust with tin foil. Bake low and slow — 350 for 50-60 minutes. When it’s done, the whole filling will be wobbly but not liquid.
Then try not to eat the whole thing, because nothing beats a perfect piece of plain old pumpkin pie.
Update: I have an updated tutorial for pie crust here.

- 6 oz. flour
- ½ tsp. salt
- 4 oz. butter, frozen, cut into cubes.
- 2 oz. (or more) ice water
- 1 15 oz. can (2 c.) pureed pumpkin
- ¾ cup brown sugar
- 3 eggs, beaten
- ½ cup half and half
- 1 cup heavy cream
- 1 teaspoon vanilla
- 1 teaspoon cinnamon
- 1 teaspoon ground ginger
- ½ teaspoon nutmeg (freshly grated if you're aiming for perfection)
- 1 small pinch ground cloves
- ½ teaspoon salt
- Pulse the frozen butter cubes with the flour and salt in the food processor only about 5 or 6 times -- there should still be chunks of butter. Add your water all at once, and pulse only a couple of times to mix. The dough should look like pebbles.
- Form into a disc, wrap in plastic wrap and chill until firm.
- When your dough is chilled, lay a piece of parchment on the counter, sprinkle with flour, add the dough disc, then more flour, then the other piece of parchment. Roll the dough, starting from the center and rolling out in all directions. Make sure to peel it off the parchment and flip it over at least once, adding more flour. You want your dough to be flattened but not stretched.
- When it's big enough, peel off the parchment and move it to your 9 inch pie plate. Take some time to lift the edges of the dough and make sure that the inside corners of the pie plate are covered. Using scissors, trim the overhang of the dough to ½ inch. Use any scraps you have to fill in any holes in the edges, adding layers of dough. Then pinch it together so it stands up nicely, and put that pie crust back in the fridge for at least 15 minutes, while the gluten relaxes and the dough firms back up.
- Preheat oven to 425 degrees.
- When it's chilled, using two fingers and your thumb, crimp the dough into a fluted pattern.
- Prick all over with a fork (sides too!) Line carefully with tin foil, and fill the tin foil with pie weights (e.g., pie weights, dried beans, uncooked rice, uncooked barley). Lay a shield atop the pie crust, or cover with tin foil. Then bake it for 16 minutes (the crust should be pale gold, and dry to the touch), and let it cool before filling it.
- Preheat oven to 350.
- Mix all of the filling ingredients together, making sure that everything is incorporated. Let rest a few minutes for the sugar to dissolve, mix again, and let rest again to let any air bubbles escape.
- Pour the filling into the pie crust (this is enough filling for a fairly deep pie), set on a cookie sheet, protect the crust with a shield or tin foil, and bake 50-60 minutes, or until the filling is set (not liquid) but still very wobbly.
- Let cool and serve chilled.


Do you blind bake all your crusts? Like, would you do it for apple or pecan? I’m tempted to experiment because I hate soggy bottom crusts, but I also hate too-brown edges (and I don’t own a pie shield).
Honestly Carol, I think it’s a balancing act. I’m more likely to blind bake pumpkin, because I think it needs the textural contrast with the smooth filling, but less likely to blind bake pecan because it’s already crunchy. I tried to give a sort of minimal blind baking time here which gives a little snap to the crust without getting the edges too brown, but in an ideal world I’d like the edges even paler.
Two crust pies are a little different — I’ve never tried to blind bake an apple pie but I bet it would be good!
You have perfectly described my struggle! My husband, since we started dating nine years ago, has always had an obsession with pumpkin. The list of pumpkin goods Ive made, from pumpkin cookies to pumpkin gingerbread trifle, is looooooooong–yet I have never brought myself to even attempt a pumpkin pie…..you have just inspired me:)
What did the oven thermometer reveal?
Great pie crust instructions
My oven was running on the hot side, as I suspected.
Just took the beauty out of the oven 🙂 thanks for the recipe I can’t wait to dive into it
i made this pie today for tomorrow’s feast, (also an apple pie with an almond coconut crust) and i am very happy to say it looks and smells wonderful! i had to bake a little longer though but i am not at sea level and i often have to bake or cook longer than is suggested in recipe’s. thanks for sharing this. i am looking forward to eating it tomorrow! ps. thank your husband for posting this blog on his facebook as i would never have found it otherwise and i am quite a fan.
I made pumpkin pie last year and bought a store bought crust. Worst decision ever. I’m definitely going to use your pie crust recipe next time. 🙂
New fan and subscriber! I found your blog looking for a crockpot chili, and browsed my way over here. It has never occurred to me to blind bake a pumpkin pie crust, either, but trust your judgment in all things. I laughed at the instruction not to fake brown sugar with white + molasses, because I always do. I’ll also have to commit to canned pumpkin. I’ve been getting bogged down in pumpkins from my CSA, but for Perfect Pumpkin Pie, I’m sure I can find them some other venue.
What size pie pan?
9 inch.
hi
Hi Kate,
so thankful to you for taking the time to place this on
your website, I came
across it after many other sites didn’t appeal to my taste buds. I’ll try it and see how it turns out. I gather that from your well scripted directions my family will love it as much as your hubby. many thanks….
Thanks Synthia! I hope you enjoy it!
I’ve just taken out of the oven my pumpkin pie! It looks great!!!!!
Pretty good recipe. I would say that after dough is in pie pan, place in refrigerator as recipe states, but I would leave in fridge for 40 minutes. THEN place pie in freezer for 20 minutes. The 40 minutes in fridges allows the strands of gluten to relax, but then the 20 minutes in freezer will give a flakier crust. Both steps are necessary. I use ceramic weights in a doubled roasting bag for pie weights. I also use a PERFORATED commercial metal pie pan. The best pumpkin pie crust ever. A stronger crust can be achieve with some vegetable shortening added in place of part of the butter. The less one touches the dough with one’s hands, the better it will be.
John – you sound like a true crust expert! I’m curious – I always thought the gluten relaxation occurred in the pre-rollout chilling- does a post-rollout refrigerator time also help?
I’m making this right now. When you said cover the pie crust (pre-filling), do you mean once the rice is in, cover that with foil as well as the edges of the crust (lip of the pie dish)? Excited to see how this comes out!!
When you said to line the crust with foil and pour in rice for weight, do I the. Out foil on top of that? (Amateur question sorry). Also, I have a metal pie crust rim cover (it just goes on the edges or lip of the pie) do I put that on too for the 16 mins? Thanks
Hi Carla. You don’t reuse the rice. The foil is just to keep the rice from getting into the dough. You can also use dried beans, or pie weights. No need to cover the entire thing, and in fact, I would let the crust get a little brown before putting the covers on. HappyThanksgiving!
Hi Kate,
This will be my first attempt at making my own pie crust as I’ve never been a fan of the store bought kind. This recipe calls for 6 ounces of flour. Will I need a scale before I can make this recipe? Other recipes I’ve seen don’t call for a weight measurement. Is there another way I can measure out the flour? Your recipe looks delicious. Thanks for posting.
Jason, one cup of flour is approximately 5 ounces. However, I say if you’re going to do a lot of baking. a scale is a great investment – it allows for precision and consistency you just don’t get from volume measurements.
I’m using this recipe for Thanksgiving. I love any recipe that requires you to “beat the crap out of it.” 🙂 People always compliment me on my cakes, how light and fluffy they are. They are plain old boxed cakes that I beat the daylights out of the eggs (always one more than called for), oil and water before I mix the dry in. Some of the time a juice will replace water – prune juice is divine in chocolate or fudge cake.
Hi Jean! I agree that beating is the true secret to cakes – I will have to try your prune juice trick! I use orange juice in place of milk or water in the recipe for my moist orange layer cake!