When I moved into Stratford House, I had visions of redecorating — immediately. Having a picture perfect house within the month. How naive I was. Our house is perfectly livable and even reasonably nicely decorated, but due to a series of obstacles, some anticipated (we ultimately prefer an eclectic house with curated furnishings and decorations amassed over years) and some unanticipated (we spent $6000 on earthquake retrofitting our foundation), it’s not the ideal I see in my head. Still, I try to tackle projects in baby steps, with the things that really bother me first.
Our nightstands were really bothering me. They were purchased many years (and three tiny New York apartments) ago, and while they were OK aesthetically, they were just too small to fit the holy quartet of nightstand accoutrements: lamp, alarm clock, book, cup of coffee. There were many many spilled cups of coffee. So I decided it was time for a change.
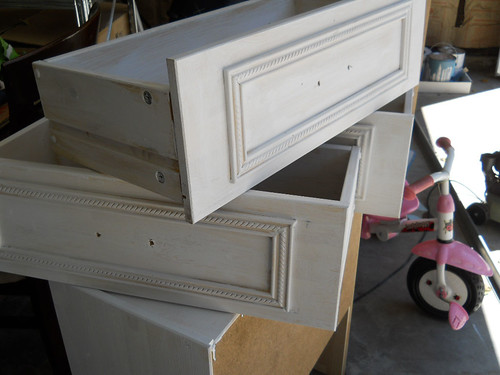
Because I am both thrifty (read: cheap) and crafty, I decided to make my own. Because I am also klutzy and not exactly a whiz with tools, I decided to start with Ikea. Notably, the Ikea Rast: $30 of plain, unfinished pine, just waiting for someone ambitious to come along and change it up:
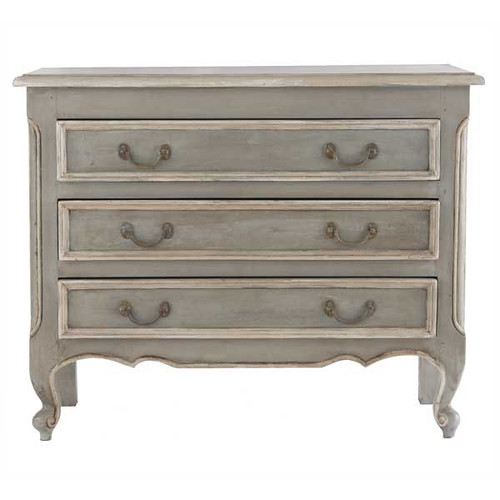
Of course, I couldn’t leave it as is. Knotty pine isn’t exactly my decorating style. I was inspired by this chest from Wisteria:
A couple of trips to Home Depot and Osh, and I was ready to begin. The first step was assembling the Rast. If you know Ikea, that was its own project. A few things that the Ikea website doesn’t really indicate is the huge, ugly screws that are visible at the side of the Rast. I screwed these in extra deep, and filled the depressions with paintable wood filler, then sanded them smooth. I also wanted a different handle placement, so I filled in the handle holes on the drawers with more wood filler, and more sanding, and drilled new holes for the handles I had bought.
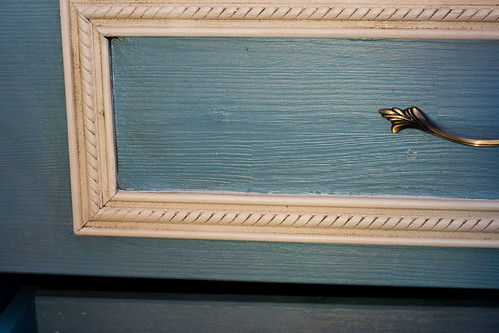
Then, I started with the molding. After much measuring and pencil marks, I bought premade decorative molding at Home Depot, and used the husband’s miter saw (he IS handy with tools, or at least he thinks he is) to trim them at a 45 degree angle to the lengths I needed for facing on the drawers and at the base of the chest. Using liquid nails, I glued these on (mostly straight- if I demanded perfection, I’d never get anything done). And let dry overnight.
Then I went to priming and painting. Since the Rast is unfinished wood, I didn’t feel the need to sand the surfaces except where I had filled holes. But since it is unfinished wood, I did need to prime them. I used the big can of cheap white primer, and brushed it on thinly.
Finally, the painting step. I wanted a color that was a little vintage and faded, while my lovely husband wanted turquoise. We compromised on “Washed Denim” in the new Martha Stewart line of paints, with the trim painted a contrasting muted white because I didn’t want it to be stark — Pratt & Lambert’s “Pebble” (since it was such a relatively small area, I just picked up a couple of sample pots in Pebble.) After a lot of taping, the painting was a breeze — it really only took 1 coat over the primer.
Once they were painted, even with the muted color of the paint and the trim, they still looked too stark — they didn’t have that vintage feel I was hoping for, and the details in the trim was being lost. So I used a combination of Howard Feed n Wax furniture wax and Minwax wood stain in Jacobean in a about a 1 to 3 ratio (1 part wax, 3 parts stain). Then, using an old pair of socks, one on each hand, I used one hand to wipe on the stain mixture, and one to wipe it off. The stain settled into the details on the trim, and made the whole piece feel a little more lived in.
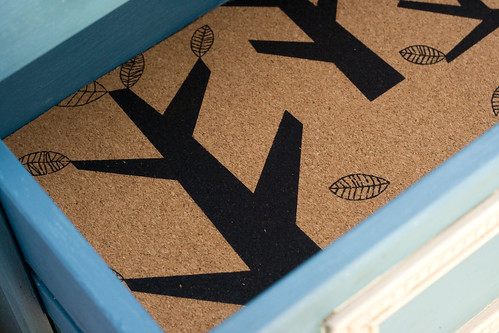
The final step was attaching the handles I had bought (and predrilled the holes for) and then lining the drawers, since I had been less than neat in the painting of the insides of the drawers (I had had enough taping with all that trim!). I never love drawer paper, because it tends to wrinkle and shift, so I bought a set of cork placemats from Ikea. These could be trimmed with scissors to make them fit, and lay beautifully flat in addition to providing some protection and shock absorption to anything I want to put in the drawers.
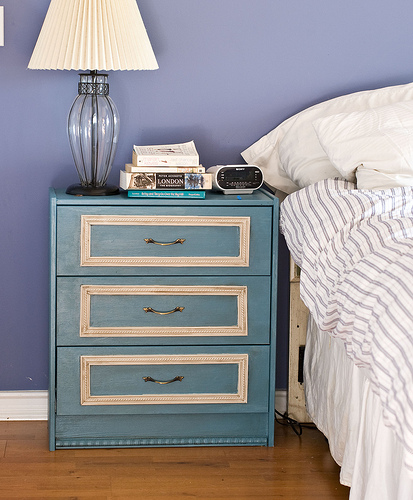
The new nightstands are big enough to hold my lamp, alarm clock, coffee and a whole stack of books. They also have the added bonus of three drawers to fill with all sorts of goodies, and they gave me hours of DIY fun. What’s not to love?





I have very similar nightstands (also from Ikea) and have wanted to get rid of them for ages but haven’t been able to find anything nice to replace them. This may be the perfect solution! They look wonderful 🙂
Lovely! I’m thinking that I need to get on the Rast bandwagon because the mismatched side tables we’re using in our bedroom just aren’t cutting it.
Beautiful! You should post this over at ikeahackers.net!
Wonderful job! You should totally submit this to design sponge.
These are amazing!! I see a trip to Ikea in my future and wonderful night stands! Just lovely.
Brava! Your nightstand is fabulous!
Wow, amazing!!
I absolutely love the final result. So creative and cheerful. Love seeing your DIY projects!
I am absolutely in love with the nightstand! You did a wonderful job and it has such character, it makes me want to find a furniture piece to start working on right now. Thanks for sharing!
Hey, those look fabulous! Great job. Especially with the antiquing.
If you need to do this again (or similar) – I recommend painting the trim separately, before glueing on. Saves a lot of taping effort.
Could you let me know where the duvet on your bed is from? I have a robe in the exact fabric and am trying to source the fabric, or at least figure out where this stuff is coming from!